|
|
|

|


|
Tamiya Chevy S-10 - 58146
|
Released by Tamiya on September 28, 1994, the Chevy S-10 was based on a mixed TA-01 and TA-02 ABS bathtub chassis.
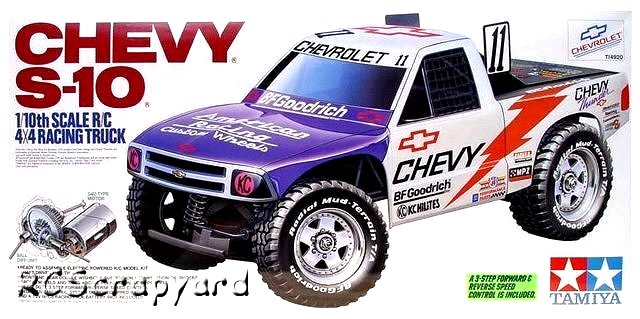
For most drivers the hybrid chassis did not work well, particularly on the off road circuits. It was classed as weak and unable to support the internals. The plastic motor mounts often broke around the screw holes and in an off road scenario it picked up mud.
The speed however was relatively good. Other racers found the car durable and most agreed that the truck was easy to maintain.
The main problem with this truck is that it was front heavy, which made it impossible to jump even small bumps without nose-diving and rolling. Thankfully because of its durability it rarely broke in these situations, but in competition with other trucks it lacked the edge.
The Chevy S-10 was never seriously made to jump and stadium racing on gravel or flat tarmac was where the truck ran more successfully.
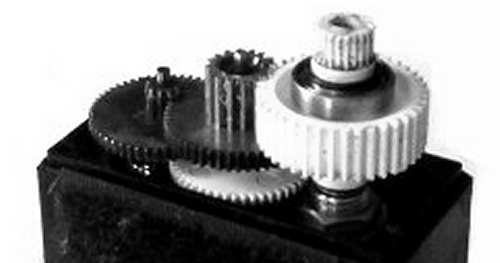
The TA-01/TA-02 ABS bathtub chassis is shaft driven four wheel drive, with orbital gear differential at the front and Ball differential at the rear. The suspension is four wheel independent double wishbone with plastic Coil Spring over Oil Filled shock absorbers.
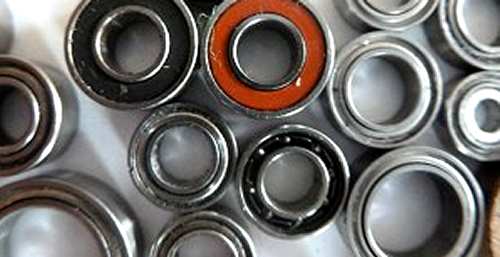
The kit comes with Plastic and sintered brass bush bearings, that after a short while, when dust and grit get into them, actually wear into the metal drive shafts. If you are building this kit to race seriously, these should be replaced by steel shielded ball bearings.


|
|
|
|
|
|
Tamiya Chevy S-10 #58146 TA01/TA02 - Chassis
 |
|
Tamiya Chevy S-10 #58146 TA01/TA02
 |
Buying a Used Tamiya Chevy S-10
|


|


|
|
|
|
Hints, Tips and Information
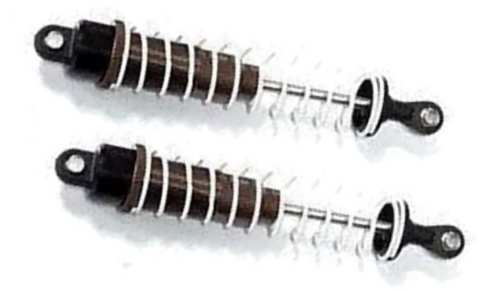
Dampers
Dampers, Shock Absorbers, Shocks - call them what you will, they are one of the least understood, but most important tools you have for adjusting the handling characteristics of your RC model.
So how do Dampers work?
Basically what you have is a small amount of silicone oil contained in a sealed cylinder. Through the centre of that cylinder is a metal rod, and on the end of that rod, a piston with a number of small holes in it. Pulling, or pushing the rod in and out of the cylinder, your will notice a certain amount of resistance as the oil is forced through the holes in the piston. |
|
Hints, Tips and Information
Painting a Lexan Body Shell.
Most RC Model kits come with an unpainted, clear Lexan plastic Body Shell you yourself must prepare and paint. This type of Body Shell is painted on the inside, and special spray or brush on Polycarbonate Paints MUST be used.
|
|
RC Models:
|
Radio & Motors: |
Other
Accessories: |