Which Connectors are the best?
Over the years I have been racing radio controlled model cars of all descriptions, I have tried a number of different connectors for my batteries.
Tamiya Connectors
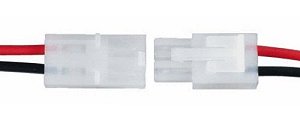 My first car was a Tamiya Boomerang and of course the batteries I used all had the standard Tamiya connectors, which were fine with the kit supplied 27T silver can electric motor, but I soon discovered their problem when I installed my first Modified motor. The high current demands of the motor created so much heat, the plastic surround of the connectors melted and fused together. No matter how I tried they could not be disconnected. My only option was to cut the wires.
Corally Connectors
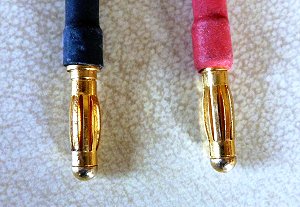 From there I moved over to Corally connectors, commonly referred to by many now as Bullet connectors. Comprising of a short length of 4mm gold plated tube at one end and what looks like what we used to call a Chinese lantern fitting that slotted inside the tube, also gold plated. Although they were highly efficient and reasonably easy to install and use, I never really took to this type of connector, I think it was the fact that there was always the possibility of the positive and negative being connected wrongly in poor light and also that if positioned side by side, each connector could work loose and become exposed, leaving the possibility of a short circuit.
Deans Connectors
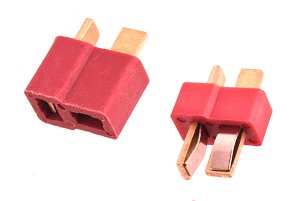 Then I remember buying some second hand batteries at an area meeting one day, that had these little red block connectors. I soon learned they were "Deans" rated at around 40 Amps. They looked like just what I was looking for so I gave them a try. They worked fine, although I didn't like the shortness of the part to be soldered. However, for about two years they were my connector of choice, until I stumbled across an advert in the "Radio Race Car International" magazine.
My Top Choice - Power-Pole Connectors
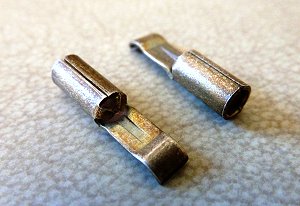 The latest development in connectors at that time were named "Power Pole", made by a company called Anderson and were rated at 45 Amps. The design uses a small tube, plated with silver, with a short extending lip, that slots over the exposed wire and can either be crimped onto the wire or soldered. For safety and efficiency, I prefer the latter. To complete the connector, a colour coded plastic cover fits neatly over it.
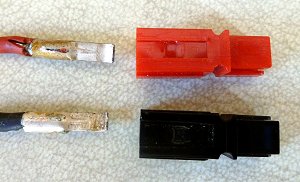 It was way back in 1995 I first used Power-Pole and to this day they are still the most efficient I have come across and never overheat.
So, if you are looking for a connector to change over to, that has a high current rating and won't cause you any overheating problems "Anderson Power Pole" is the one I recommend.
|


