|
|
|

|


|
|
1/10 Scale Electric Rally/Touring Car:
Xpress M-Chassis Pro Kit - MRR-10P
|
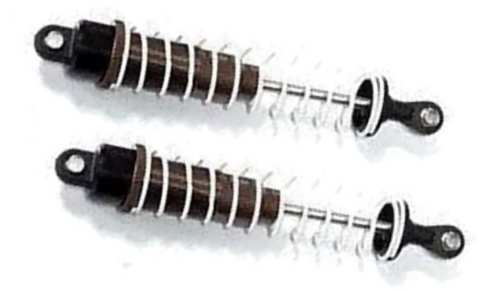
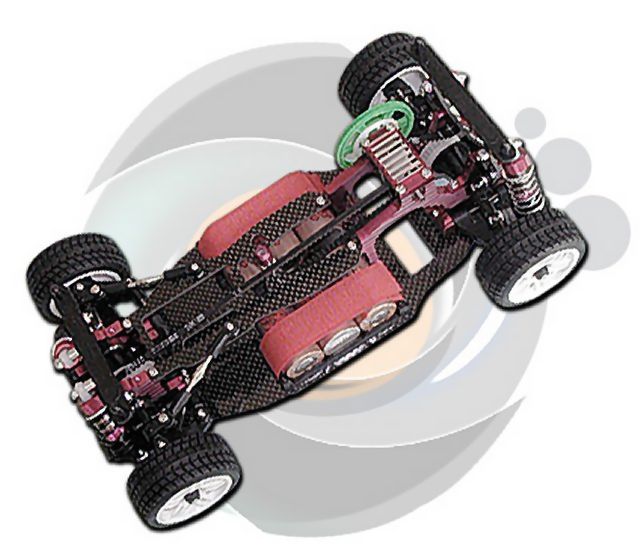
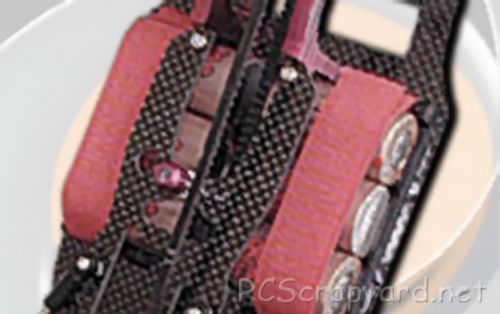
Introduced by Xpress circa 1999, the Xpress M-Chassis Pro Touring Car model kit - # 962 - MRR-10P - was a short wheelbase version, prepared for saddle pack batteries.
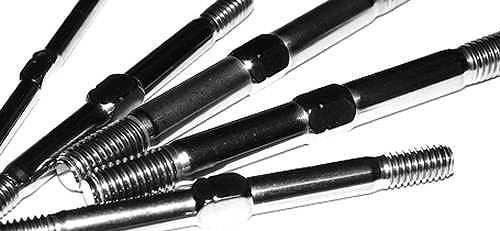
The model is belt driven, on a double deck chassis, with ball differentials, coil spring over oil filled dampers, universal joint drive-shafts and ball bearings.
To race the Xpress MRR-10P, it requires a high level of tuning for improved stability when cornering, to keep it on the track and give you more grip under acceleration. Even the smallest change in your cars settings can make a Big difference. Our simple to follow instruction chart will show how to attain the best Set-up for your personal requirements.


|
|
|
|
★ Xpress M-Chassis Pro Kit - MRR-10P ★
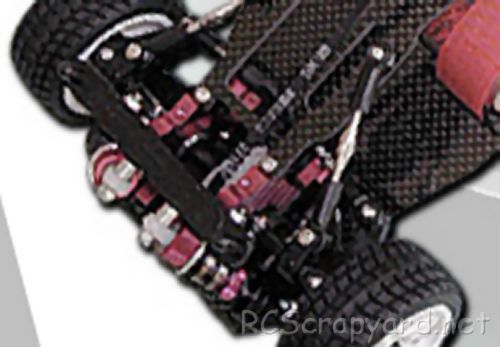
★ Xpress M-Chassis Pro Kit - MRR-10P Chassis ★
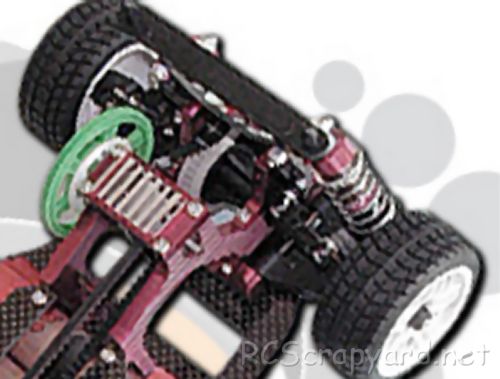
★ Xpress M-Chassis Pro Kit - MRR-10P Chassis ★
|
Buying a Used Xpress MRR-10P
|
|
Manufacturers and Brands Catalogued, Listed and Reviewed by RC-Scrapyard.
At present, the RC Model Manufacturers, Brands and Distributors covered by us are: ABC Hobby, Academy, Acme Racing, Agama Racing, Amewi, Ansmann Racing, ARRMA, Team Associated, Atomic RC, Axial, AYK, Bolink, BSD Racing, Capricorn, Carisma, Carson, Caster Racing, Cen, Corally, Custom Works, Durango, Duratrax, ECX - Electrix, Exceed RC, FG Modellsport, FS-Racing, FTX, Fujimi, Gmade, GS-Racing, Harm, HBX, Helion, Heng Long, Himoto Racing, Hirobo, Hitari, Hobao, Hong-Nor, Hot Bodies, HPI, HSP, Intech, Integy, Jamara, JQ Products, Kawada, Kyosho, Losi, LRP, Maisto, Mardave, Marui, Maverick, MCD Racing, Megatech, Mugen, New Bright, Nichimo, Nikko, Nkok, Ofna, Pro-Pulse, Protech, PTI, RC4WD, Redcat Racing, RJ-Speed, Robitronic, Schumacher, Seben, Serpent, Smartech, Sportwerks, Step-Up, Tamiya, Team-C Racing, Team Magic, Thunder Tiger, Tomy, Top Racing, Traxxas, Trinity, Tyco, Vaterra RC, Venom, VRX Racing, WLToys, X-Factory, Xmods, Xpress, Xray, XTM, Yankee RC, Yokomo, ZD Racing and Zipzaps. |
|
Hints, Tips and Information
Bumpsteer
In plain language, Bumpsteer is exactly what it sounds like. If your car goes over a bump, it will affect the toe-in setting and can on some tracks make handling of the car in a straight line difficult. |
|
Hints, Tips and Information
How to put on Decals
After spending lots of time and effort to paint your bodyshell, you come to the point where you make it look good by putting on all those flashy decals, but before you rush in with the scissors and start cutting, there are a few things you should do first. |
|
RC Models:
|
Radio & Motors: |
Other
Accessories: |