|
|
|

|


|
|
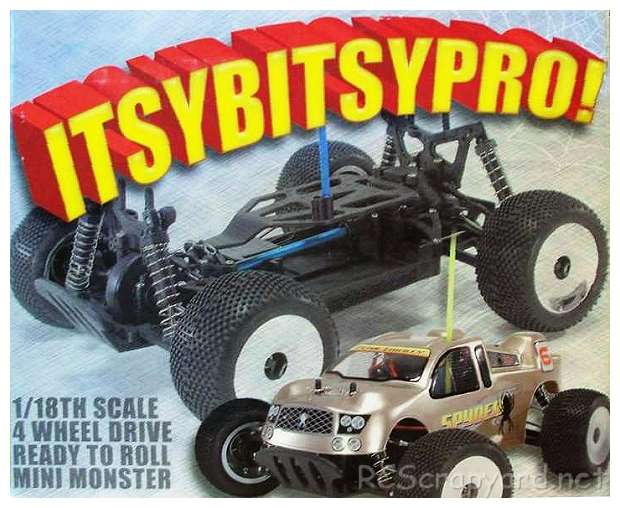
1/18 Scale Electric Monster Truck:
Trinity Itsy Bitsy Pro
|
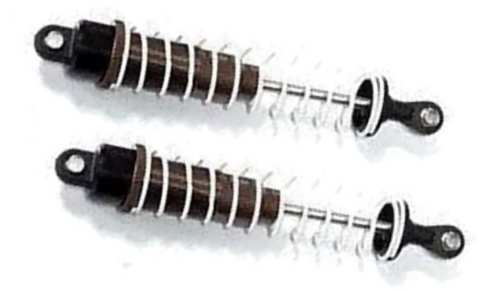
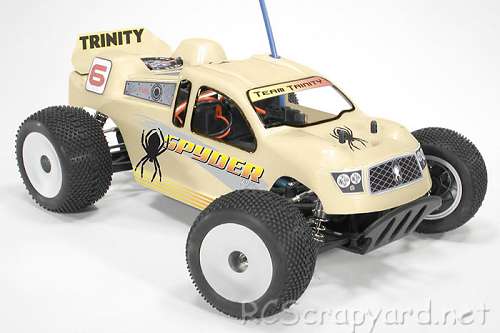
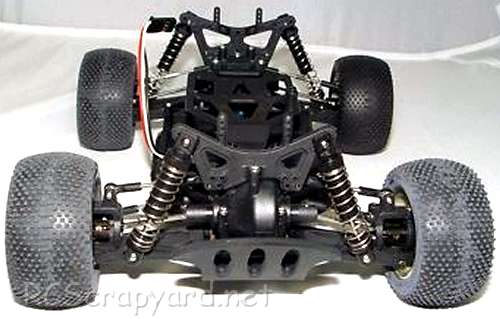
Introduced by Team Trinity circa 2005, the 4WD Itsy Bitsy Spyder Pro Monster / Stadium Truck - # TRI90007 - came RTR with a motor, ESC and radio system.
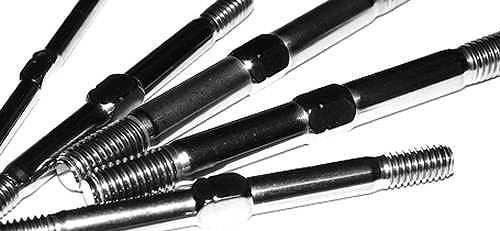
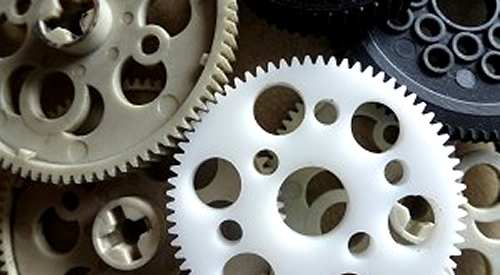
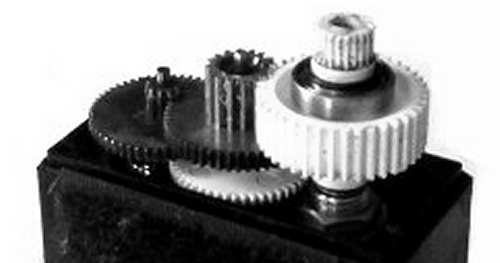
The model is shaft driven, on a molded plastic chassis, with gear type differentials, coil spring over oil filled dampers, dogbone drive-shafts and a full set of ball bearings.
To race the Trinity Itsy Bitsy Pro, it requires a high level of tuning for improved stability when cornering, to keep it on the track and give you more grip under acceleration. Even the smallest change in your cars settings can make a Big difference. Our simple to follow instruction chart will show how to attain the best Set-up for your personal requirements.


|
|
|
|
★ Trinity Itsy Bitsy Pro Chassis ★
★ Trinity Itsy Bitsy Pro Chassis ★
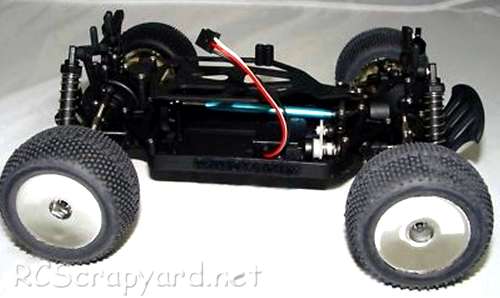
★ Trinity Itsy Bitsy Pro Chassis ★
|
Buying a Used Trinity Itsy Bitsy Pro
|
|
Manufacturers and Brands Catalogued, Listed and Reviewed by RC-Scrapyard.
At present, the RC Model Manufacturers, Brands and Distributors covered by us are: ABC Hobby, Academy, Acme Racing, Agama Racing, Amewi, Ansmann Racing, ARRMA, Team Associated, Atomic RC, Axial, AYK, Bolink, BSD Racing, Capricorn, Carisma, Carson, Caster Racing, Cen, Corally, Custom Works, Durango, Duratrax, ECX - Electrix, Exceed RC, FG Modellsport, FS-Racing, FTX, Fujimi, Gmade, GS-Racing, Harm, HBX, Helion, Heng Long, Himoto Racing, Hirobo, Hitari, Hobao, Hong-Nor, Hot Bodies, HPI, HSP, Intech, Integy, Jamara, JQ Products, Kawada, Kyosho, Losi, LRP, Maisto, Mardave, Marui, Maverick, MCD Racing, Megatech, Mugen, New Bright, Nichimo, Nikko, Nkok, Ofna, Pro-Pulse, Protech, PTI, RC4WD, Redcat Racing, RJ-Speed, Robitronic, Schumacher, Seben, Serpent, Smartech, Sportwerks, Step-Up, Tamiya, Team-C Racing, Team Magic, Thunder Tiger, Tomy, Top Racing, Traxxas, Trinity, Tyco, Vaterra RC, Venom, VRX Racing, WLToys, X-Factory, Xmods, Xpress, Xray, XTM, Yankee RC, Yokomo, ZD Racing and Zipzaps. |
|
Hints, Tips and Information
My First National
When I first started in RC, way back in the late 1980s, I would turn up to the weekly club meeting, with my Tamiya Boomerang, Acoms transmitter, two sets of crystals, a couple of 7.2v batteries, a charger and a tool box with a wheel spanner and a few spares. |
|
Hints, Tips and Information
Ackerman
So - What is Ackerman? |
|
RC Models:
|
Radio & Motors: |
Other
Accessories: |