|
|
|

|


|
|
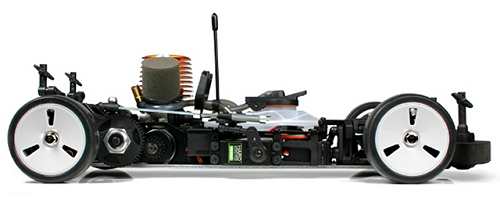
1/10 Scale Nitro Rally/Touring Car:
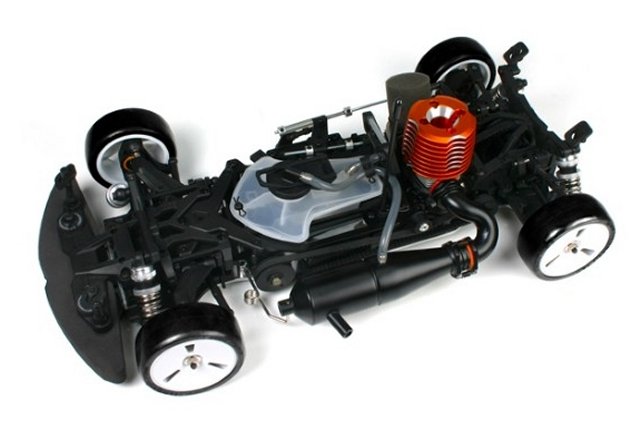
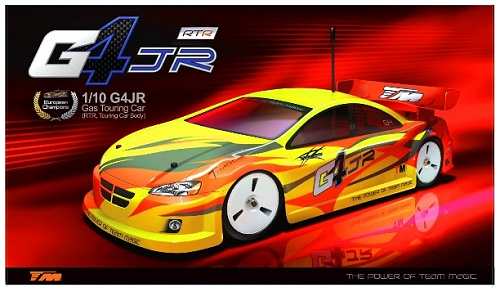
Team Magic G4-JR - TM 502088
|
Introduced by Team Magic circa 2008, the 4WD G4JR - TM 502088 - came RTR with an engine and radio system.
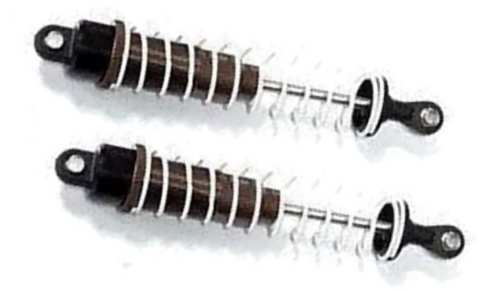
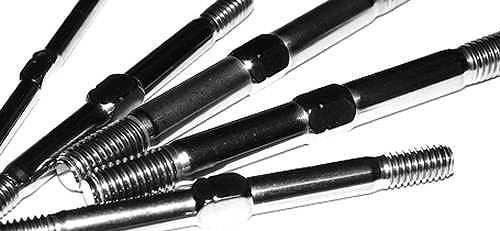
The model is belt driven, on an alloy plate chassis, with front and rear gear type differentials, coil spring over oil filled dampers, universal joint drive-shafts and a full set of ball bearings.
A G4JR Combo version - TM 502088C - with a starter-box, was also available.
To race the Team Magic G4-JR, it requires time and patience, to tune and adjust for improvements in handling and steering ability and to get the grip you need to stay on course when manoeuvring around tight, slippery corners. A little can be a lot when it comes to changing your cars settings and our easy methodical directions will guide you to the best Set-up to help you win and keep you winning.


|
|
|
|
★ Team Magic G4-JR ★
★ Team Magic G4-JR Chassis ★
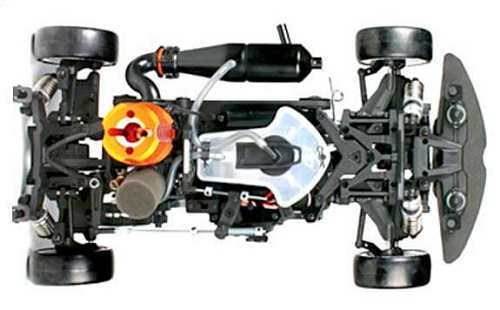
★ Team Magic G4-JR Chassis ★
|
Buying a Used Team Magic G4-JR
|
|
Manufacturers and Brands Catalogued, Listed and Reviewed by RC-Scrapyard.
At present, the RC Model Manufacturers, Brands and Distributors covered by us are: ABC Hobby, Academy, Acme Racing, Agama Racing, Amewi, Ansmann Racing, ARRMA, Team Associated, Atomic RC, Axial, AYK, Bolink, BSD Racing, Capricorn, Carisma, Carson, Caster Racing, Cen, Corally, Custom Works, Durango, Duratrax, ECX - Electrix, Exceed RC, FG Modellsport, FS-Racing, FTX, Fujimi, Gmade, GS-Racing, Harm, HBX, Helion, Heng Long, Himoto Racing, Hirobo, Hitari, Hobao, Hong-Nor, Hot Bodies, HPI, HSP, Intech, Integy, Jamara, JQ Products, Kawada, Kyosho, Losi, LRP, Maisto, Mardave, Marui, Maverick, MCD Racing, Megatech, Mugen, New Bright, Nichimo, Nikko, Nkok, Ofna, Pro-Pulse, Protech, PTI, RC4WD, Redcat Racing, RJ-Speed, Robitronic, Schumacher, Seben, Serpent, Smartech, Sportwerks, Step-Up, Tamiya, Team-C Racing, Team Magic, Thunder Tiger, Tomy, Top Racing, Traxxas, Trinity, Tyco, Vaterra RC, Venom, VRX Racing, WLToys, X-Factory, Xmods, Xpress, Xray, XTM, Yankee RC, Yokomo, ZD Racing and Zipzaps. |
|
Hints, Tips and Information
Painting a Lexan Body Shell.
Most RC Model kits come with an unpainted, clear Lexan plastic Body Shell you yourself must prepare and paint. This type of Body Shell is painted on the inside, and special spray or brush on Polycarbonate Paints MUST be used.
|
|
Hints, Tips and Information
Slipper Clutch and Hydra-Drive
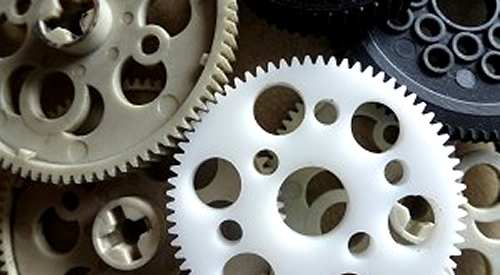
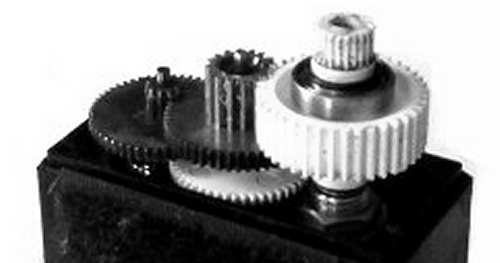
More often installed on Off-Road RC Models, the Slipper Clutch has been around since the late 1990s. Basically the idea is to prevent wheel spin and increase traction under acceleration, to improve the cars stability from a standing start, when landing from jumps or on corner exits. It also protects the spur gear and drivetrain, to some degree, when using a high torque motor. |
|
RC Models:
|
Radio & Motors: |
Other
Accessories: |