|
|
|

|


|
|
1/8 Scale Electric Rally/Touring Car:
Capricorn LAB E801 (Radio Controlled Model Review)History and Info:
Introduced by Capricorn RC circa 2014, the LAB E801 Electric Touring Car Chassis was available in two versions: Standard - able to accept all the conventional batteries and motors, and Monoblock - requiring a "TTB Version" drive set to be purchased. Both versions were available as an assembly Kit, requiring a Radio System, motor, ESC, battery, charger, servo and a Lexan bodyshell to be purchased separately.
▼ Scroll Down for More Images ▼
|


|
|
|
|
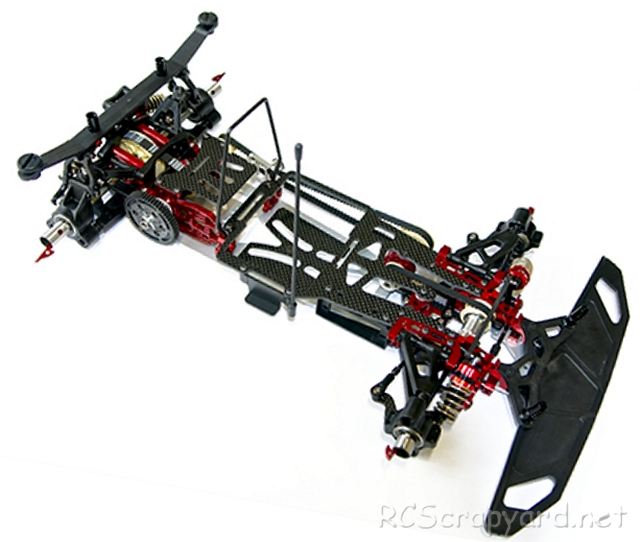
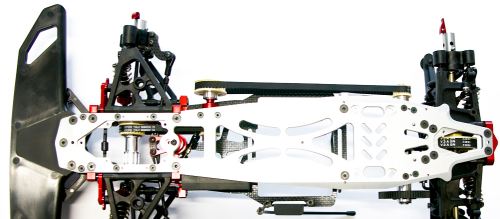
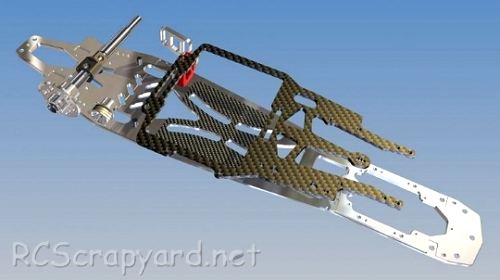
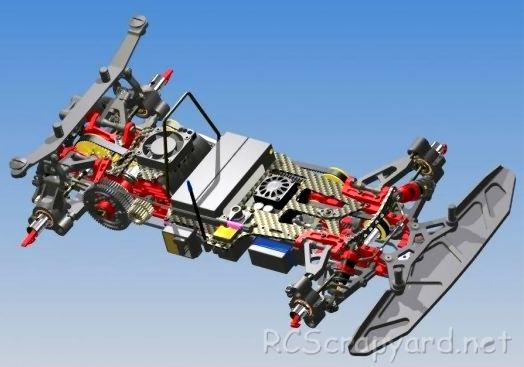
★ Capricorn LAB E801 Chassis ★
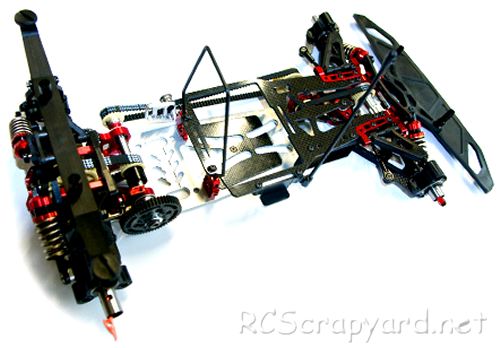
★ Capricorn LAB E801 Chassis ★
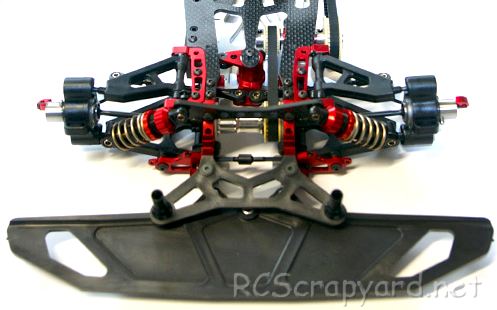
★ Capricorn LAB E801 Chassis ★
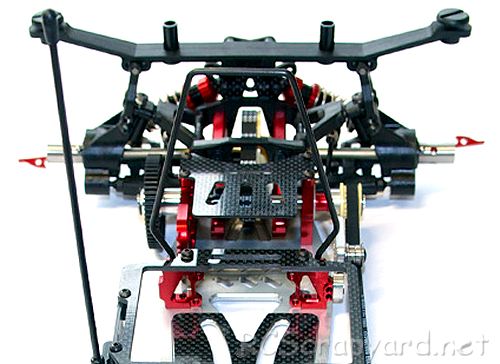
★ Capricorn LAB E801 Chassis ★
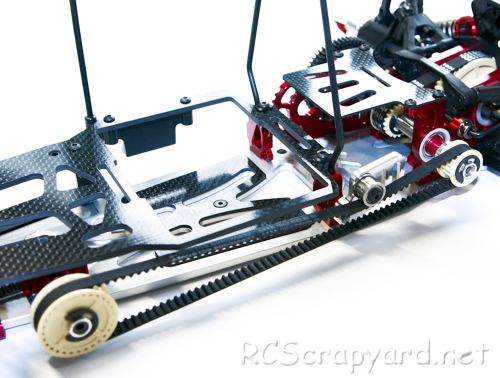
★ Capricorn LAB E801 Chassis ★
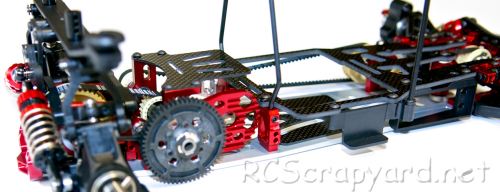
★ Capricorn LAB E801 Chassis ★
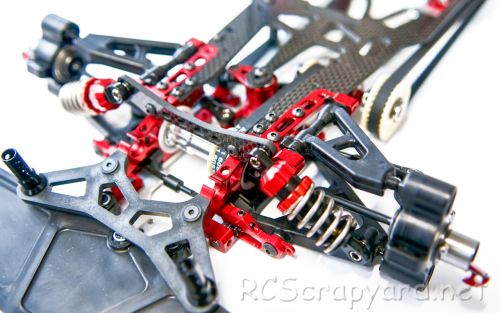
★ Capricorn LAB E801 Chassis ★
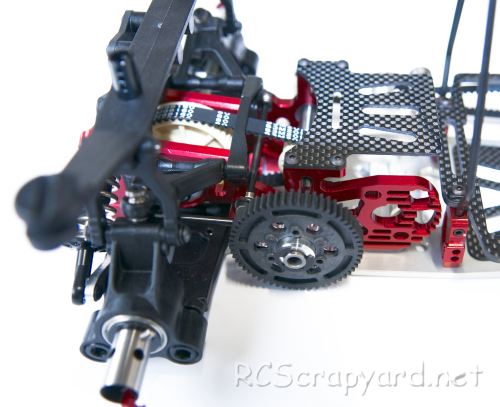
★ Capricorn LAB E801 Chassis ★
★ Capricorn Upgrade for C801 to E801 TTB ★
★ Capricorn LAB E803 Two Speed Chassis ★
|
Buying a Used Capricorn LAB E801
|
|
Manufacturers and Brands Catalogued and Listed by RC-Scrapyard.
At present, the RC Model Manufacturers, Brands and Distributors covered by us are: ABC Hobby, Academy, Acme Racing, Agama Racing, Amewi, Ansmann Racing, ARRMA, Team Associated, Atomic RC, Axial, AYK, Bolink, BSD Racing, Capricorn, Carisma, Carson, Caster Racing, Cen, Corally, Custom Works, Durango, Duratrax, ECX - Electrix, Exceed RC, FG Modellsport, FS-Racing, FTX, Fujimi, Gmade, GS-Racing, Harm, HBX, Helion, Heng Long, Himoto Racing, Hirobo, Hitari, Hobao, Hong-Nor, Hot Bodies, HPI, HSP, Intech, Integy, Jamara, JQ Products, Kawada, Kyosho, Losi, LRP, Maisto, Mardave, Marui, Maverick, MCD Racing, Megatech, Mugen, New Bright, Nichimo, Nikko, Nkok, Ofna, Pro-Pulse, Protech, PTI, RC4WD, Redcat Racing, RJ-Speed, Robitronic, Schumacher, Seben, Serpent, Smartech, Sportwerks, Step-Up, Tamiya, Team-C Racing, Team Magic, Thunder Tiger, Tomy, Top Racing, Traxxas, Trinity, Tyco, Vaterra RC, Venom, VRX Racing, WLToys, X-Factory, Xmods, Xpress, Xray, XTM, Yankee RC, Yokomo, ZD Racing and Zipzaps. |
|
Hints, Tips and Information
Bodyshell Aerodynamics
It is commonly understood that weight improves traction, and if you have ever seen TV coverage of any kind of full size motor racing, you will have heard the comentators talking about, aerodynamics, downforce and ground effect. Well, even though they are only a fraction of the size and weight, these terms also relate to small scale model racing cars. |
|
Hints, Tips and Information
Soldering Battery Packs
Nicad and Nimh batteries sometimes come as six separate matched 1.2 volt cells. These of course have to be soldered to each other in series to produce either a side by side stick pack, or a two times three cell saddle pack.
|
|
RC Models:
|
Radio & Motors: |
Other
Accessories: |