|
|
|

|


|
|
1/12 Scale Electric On-Road Car:
AYK RX1200
|
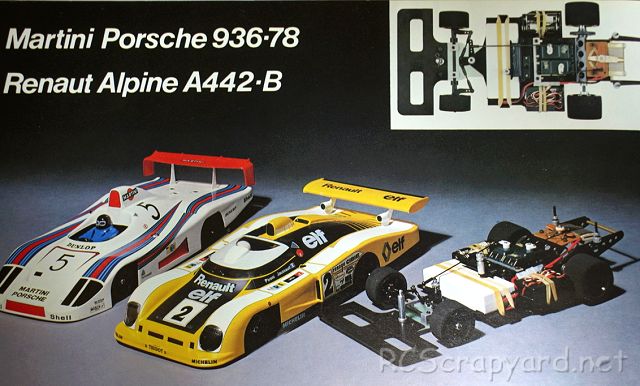
Introduced by AYK Aoyagi Metals Co circa 1978, the original 2WD RX1200 pan chassis was available with four bodyshell options: Big Nova - Big March - Big Renault Alpine A442-B - and Big Martini Porsche 936-78.
The model is based on a black anodised aluminum alloy double deck chassis, with alloy motor-mount and a servo operated wound wire rheostat type speed controller. The original model did not have a differential.
The standard alloy motor-mount could accommodate 380 motors, but an optional motor-mount could be purchased for 540 motors and to reduce weight, improve acceleration and cornering ability, a special FRP lower deck was available.
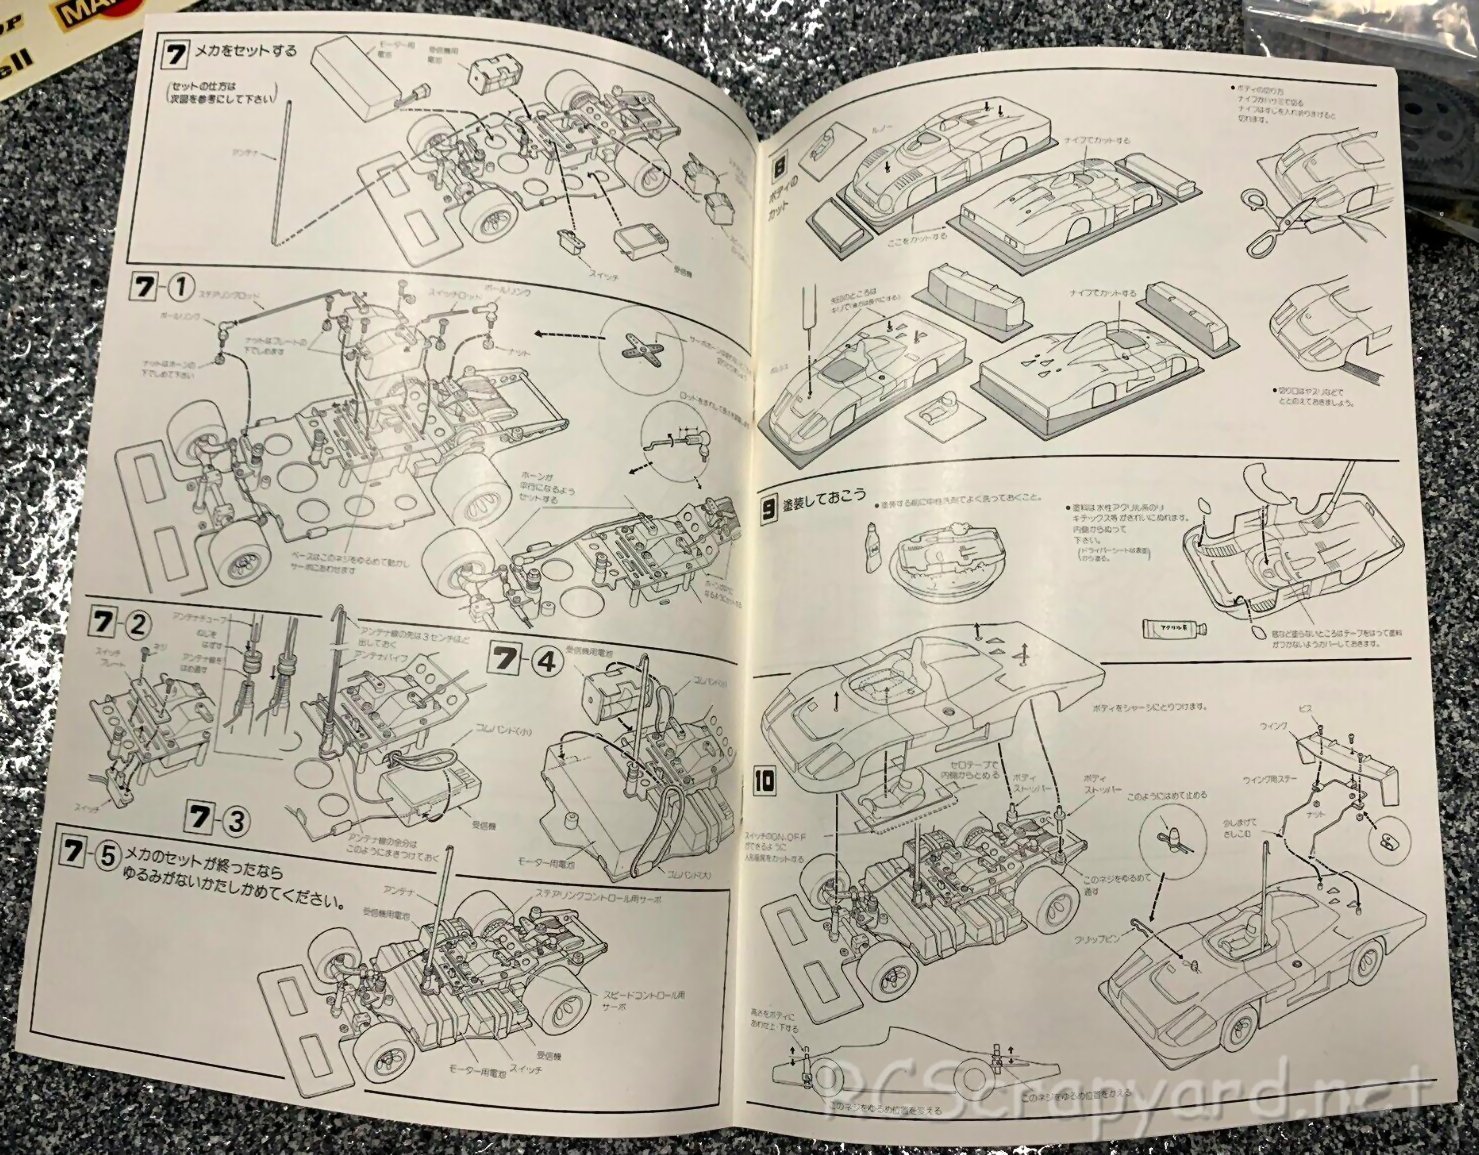
To race the AYK RX1200, it requires a high level of tuning for improved stability when cornering, to keep it on the track and give you more grip under acceleration. Even the smallest change in your cars settings can make a Big difference. Our simple to follow instruction chart will show how to attain the best Set-up for your personal requirements.


|
|
|
|
★ AYK RX1200 Chassis ★
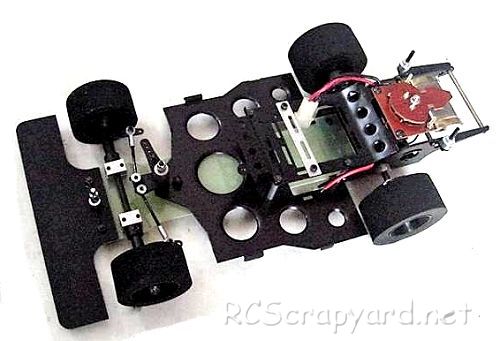
★ AYK RX1200 Chassis ★

★ AYK RX1200 Manual ★
|
Buying a Used Radio Controlled Model
|
|
Manufacturers and Brands Catalogued, Listed and Reviewed by RC-Scrapyard.
At present, the RC Model Manufacturers, Brands and Distributors covered by us are: ABC Hobby, Academy, Acme Racing, Agama Racing, Amewi, Ansmann Racing, ARRMA, Team Associated, Atomic RC, Axial, AYK, Bolink, BSD Racing, Capricorn, Carisma, Carson, Caster Racing, Cen, Corally, Custom Works, Durango, Duratrax, ECX - Electrix, Exceed RC, FG Modellsport, FS-Racing, FTX, Fujimi, Gmade, GS-Racing, Harm, HBX, Helion, Heng Long, Himoto Racing, Hirobo, Hitari, Hobao, Hong-Nor, Hot Bodies, HPI, HSP, Intech, Integy, Jamara, JQ Products, Kawada, Kyosho, Losi, LRP, Maisto, Mardave, Marui, Maverick, MCD Racing, Megatech, Mugen, New Bright, Nichimo, Nikko, Nkok, Ofna, Pro-Pulse, Protech, PTI, RC4WD, Redcat Racing, RJ-Speed, Robitronic, Schumacher, Seben, Serpent, Smartech, Sportwerks, Step-Up, Tamiya, Team-C Racing, Team Magic, Thunder Tiger, Tomy, Top Racing, Traxxas, Trinity, Tyco, Vaterra RC, Venom, VRX Racing, WLToys, X-Factory, Xmods, Xpress, Xray, XTM, Yankee RC, Yokomo, ZD Racing and Zipzaps. |
Information and AdviceElectronic Speed ControllersHistory
ESC were originally developed to be used in conjunction with brushed 27T stock and modified motors in the late 1970s, early 1980s. Compared to modern day Controllers, they were Bulky and heavy, constructed using basic resistors, rheostats, capacitors and transistors, crammed together on a simple circuit board, to provide stepped but smooth acceleration when compared to the old mechanical, servo operated sweeper Speed Controllers. An Electronic Switch to change the direction of current flow was used on some of these early ESC to give reverse operation. Although they were a vast improvement on the old mechanical speedos of the time, they were expensive, jerky to control, and prone to burn out if not carefully looked after. |
|
Hints, Tips and Information
Ride Height
To allow the suspension on any RC model to do its work properly, it needs to ride in a position where it is able to react to any bumps and holes it may encounter on the track. Therefore, it needs to be adjusted to somewhere in-between those limits. That position is commonly termed "ground clearance" or "ride height" and is generally measured as the distance between the underside of the chassis and the ground, with the motor and battery etc installed. |
|
RC Models:
|
Radio & Motors: |
Other
Accessories: |