|
![]() |
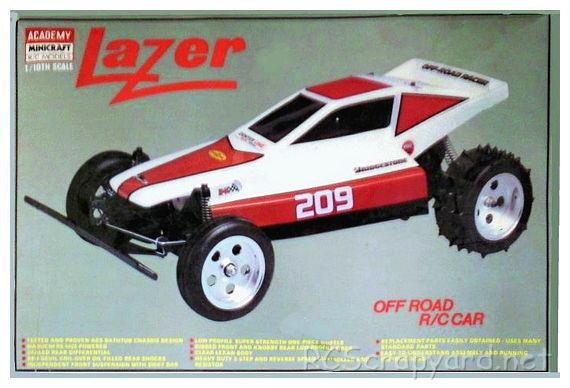
1/10 Scale Electric Buggy:Academy Lazer (Radio Controlled Model)Navigation: Sitemap > Manufacturers > Academy > Academy Timeline All Manufacturers: Model Types > Buggys > 1/10 Electric Buggys History + Information (and How To Set-up Tips):Introduced by Academy Minicraft circa 1988, the 2WD Lazer Buggy was similar to the Road Runner II and described as a Tamiya Grasshopper / Hornet clone. 
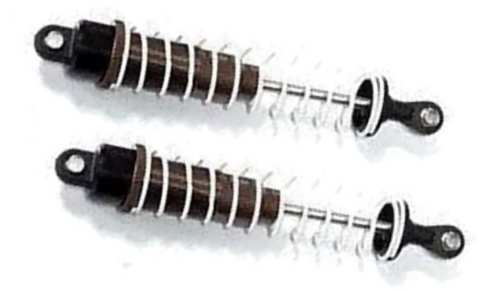
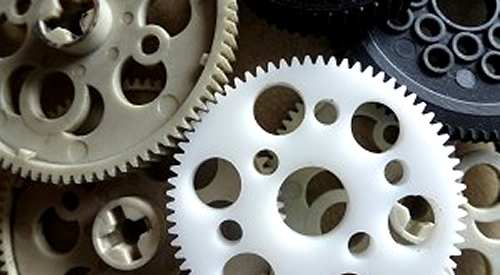
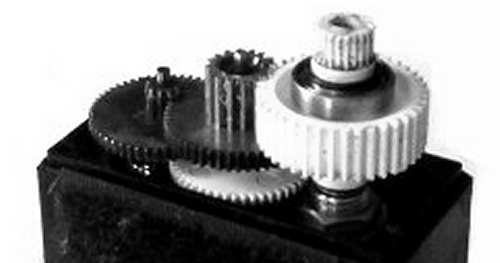
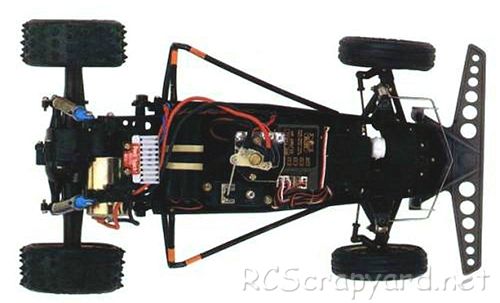
The model came with an RS-540S motor and three step servo operated mechanical speed controller and was based on an ABS resin bathtub chassis, with a lexan polycarbonate bodyshell, sealed gearbox, gear type differential, rear swing arm suspension with coil spring over oil filled dampers, front anti-roll bar and bushings. ![]() To race the Academy Lazer, it requires a high level of tuning for improved stability when cornering, to keep it on the track and give you more grip under acceleration. Even the smallest change in your cars settings can make a Big difference. Our simple to follow instruction chart will show how to attain the best Set-up for your personal requirements. With simple to follow language, we can point you towards the correct Electric Motor for your Lazer and achieve the best Gearing, for your battery and motor combination. Learn the secrets the professionals have known for years to get the best from their Bearings using a number of simple tips. See how you can easily avert Radio interference, and the best way to safely Charge your Batteries, for improved acceleration and more run time. |
![]() ![]() ![]() ![]() ![]() ![]() ![]() ![]() |
|
![]() ★ Academy Road Runner II Chassis ★![]() |
Buying a Used Academy Lazer |
Manufacturers and Brands Catalogued and Listed by RC-Scrapyard.At present, the RC Model Manufacturers, Brands and Distributors covered by us are: ABC Hobby, Academy, Acme Racing, Agama Racing, Amewi, Ansmann Racing, ARRMA, Team Associated, Atomic RC, Axial, AYK, Bolink, BSD Racing, Capricorn, Carisma, Carson, Caster Racing, Cen, Corally, Custom Works, Durango, Duratrax, ECX - Electrix, Exceed RC, FG Modellsport, FS-Racing, FTX, Fujimi, Gmade, GS-Racing, Harm, HBX, Helion, Heng Long, Himoto Racing, Hirobo, Hitari, Hobao, Hong-Nor, Hot Bodies, HPI, HSP, Intech, Integy, Jamara, JQ Products, Kawada, Kyosho, Losi, LRP, Maisto, Mardave, Marui, Maverick, MCD Racing, Megatech, Mugen, New Bright, Nichimo, Nikko, Nkok, Ofna, Pro-Pulse, Protech, PTI, RC4WD, Redcat Racing, RJ-Speed, Robitronic, Schumacher, Seben, Serpent, Smartech, Sportwerks, Step-Up, Tamiya, Team-C Racing, Team Magic, Thunder Tiger, Tomy, Top Racing, Traxxas, Trinity, Tyco, Vaterra RC, Venom, VRX Racing, WLToys, X-Factory, Xmods, Xpress, Xray, XTM, Yankee RC, Yokomo, ZD Racing and Zipzaps. This is an ongoing project, with new and "lost in time" RC Model Brands being added as they are found and although most of those listed above have been covered in relative detail, some are still being researched and will be completed in the near future. |
Hints and TipsCamberCamber is described as the angle of the wheel as you look at it directly from the front or rear of your car and if set correctly will improve your cars cornering ability considerably, by providing increased traction. This simple to make adjustment is considered by many to be one of the most effective changes you can make to your car for better handling. Positive Camber is when the top of the wheel is angled outwards. Negative Camber has the top of the wheel angled inwards. First of all, get yourself a good camber gauge. All adjustments to your cars camber setting should be made with the car in race mode that means the motor, battery etc in position in the chassis. To check the angle of an On Road car, it must have the ride height already set to around 5mm. Place the car on a perfectly flat surface, position your camber gauge against the side of the wheel you are checking and take the camber angle, normally this is between -1 and -3 degrees negative. Next, put a small 1mm thick piece of card under that corner of the car and push the corner down until it touches the card. In this position, check the angle again. It should be between 0 and -0.5 degrees negative camber. If not, pick up the car and put it back down on the flat surface, check and make adjustments, using the turnbuckle, that you consider are needed to achieve your goal. Keep checking and adjusting and repeat for all four corners. What you are aiming for is an angle that will provide your car with the maximum amount of rubber on the track on high speed corners. Off Road cars can be adjusted in a similar manner to that described previously, with the ride height set at around 20mm, but in place of the card, use a small booklet or something around 5mm thick. The optimal camber setting is a little more difficult to find for off road cars and depends generally of the track surface you are racing on. Slippery tracks generally require less camber because of reduced suspension movement when cornering, whereas high grip tracks require more camber to compensate for inertial induced body-roll. Depending on the particular model, this setting can be anything between -1 and -5 degrees … sometimes more. Check your model manual for details. Be aware that for all model types, too much negative camber can reduce straight line traction, but with a good setting for any particular track, the advantage it gives, that of vastly improved cornering stability, far outweigh any negative effects. For beginners, this setting is by far the easiest to experiment with. Just take the car out on the back yard and with a few simple turns of a turnbuckle you will soon learn just what difference a small change in your cars setup can do to change its handling ability. Good luck and good racing. |
Hints and TipsRadio FrequenciesAfter buying your first car, it won't be long before you need more than simply bashing around the back yard, or out on the street. So you will be looking around to find a club that is not too far away where you can do some serious racing. Before you can start racing, you will need at least three different sets of crystal frequencies. The race organisers will note down all your available frequencies when you register at the track and allocate one of those frequencies to you for your heat. To avoid change over problems from one heat to the next, they generally try to give you a frequency that no one in the heat before or after is using, but always check to make sure before you put your car down on the track and switch on. There is nothing more annoying than to be in the middle of your best qualifying race and some idiot switching on their transmitter in the pits, on your frequency. Not only could it spoil your race, but it could cost you a lot of money if at the time you are travelling at top speed along the straight, loose control and crash head on into the wall. Just imagine how you would feel. Now, imagine this scenario. You are at your RC meeting and you need to run your car to check out some changes you have made, either after a crash repair, to adjust the steering servo, or just fine tune your car before the next race. What do you do? Before you switch on anything, the first thing to do is check with race control, to make sure that none of the racers presently on the track or in the next heat are on the same frequency you want to use. The people in charge are always willing to help in these situations and if none of your three available frequencies are safe for you to use, they will often lend you some crystals, sometimes for a small fee. Some of the bigger meetings use a board displaying all the possible frequencies, indicating which of those frequencies are in use at that time and which are available for others to use. To claim a particular frequency you simply take a peg or marker off the board so that others wanting to check their car out can not use the same frequency as you. Before the next heat, this board is updated and any missing pegs must be accounted for. So obviously the best time to claim your frequency, is at the start of a heat and you must return it before the start of the next heat. So, be cautious, use the protocols at your track as they should be used and you won't make any enemies … you know it makes sense. |
|
|