

|
|
|

|


|
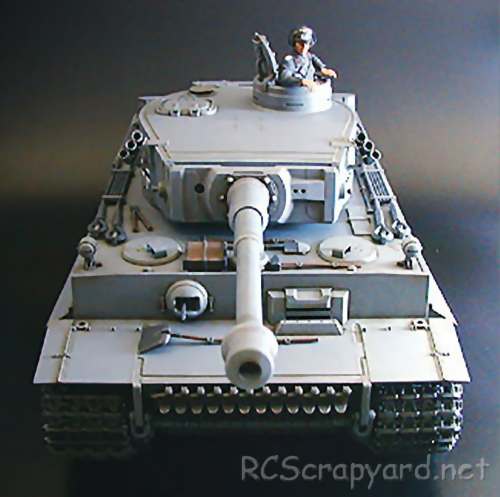
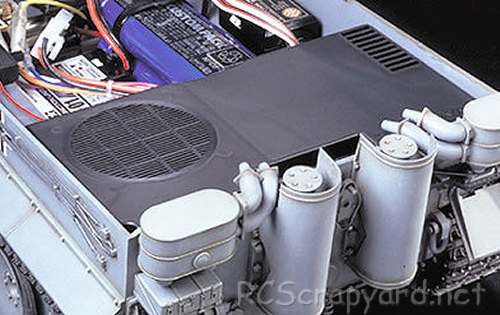
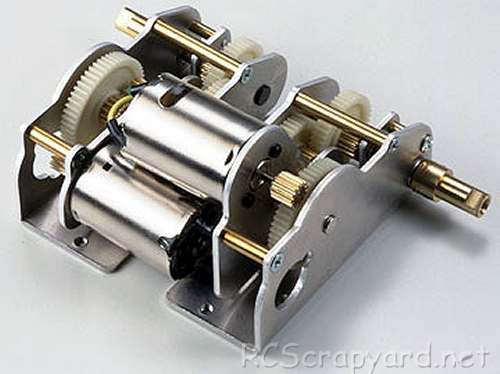
Tamiya German Tiger I Early Production - RTR - 23609
|
Released by Tamiya on December 1, 2002, the German Tiger I Early Production (# 23609) is the Factory Finished, Limited Edition, RTR version.
The front-mounted gearbox contains two Type 380 motors that can operate together or individually to produce forward/reverse running and pivot turning. Metal torsion bars and suspension arms combine with the wide tracks to smoothly absorb bumps and dips in the terrain and provide high manoeuvrability. In addition, realistic engine sounds accompany the tank as it starts up, drives and stops to idle. The main gun can be elevated, depressed and swung to the left and right.
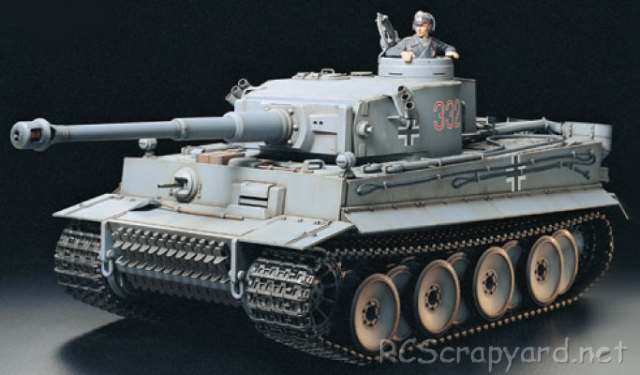
First deployed in 1942 in Africa and Europe, the Tiger 1 was usually in independent heavy tank battalions. Its final designation was Panzerkampfwagen VI Tiger Ausf. E often shortened to Tiger. The Tiger I gave the Wehrmacht its first armoured fighting vehicle that mounted the 8.8 cm KwK 36 gun (not to be confused with the 8.8 cm Flak 36). 1,347 were built between August 1942 and August 1944.[9] After August 1944, production of the Tiger I was phased out in favour of the Tiger II.
This model comes with metal bushings, that after a short while, when dust and grit get into them, can actually wear into the metal drive shafts that spin in them - we recommend these should be replaced by a full set of steel shielded ball bearings ASAP.


|
|
|
|
|
|
Hints, Tips and Information
How to avoid Radio Interference
1/ The first consideration when installing your Receiver into your Electrically Powered Model is to make sure it is well away from the Negative Battery terminal, and the Motor. The Magnetic field can cause stuttering type interference at times of high current draw (i.e., Fast Acceleration) |


|


|
|
|
|
Hints, Tips and Information How to Charge Rechargeable Batteries for Peak PerformanceNi-Cad (Nickel Cadmium) Batteries
1/ All Ni-Cad Batteries have to be Discharged soon after use. This is to avoid the dreaded "Memory" effect that on subsequent re-charges can cause a momentary drop in performance during a race. A simple discharger can be made from a car 12v bulb.
Ni-Mh (Nickel Metal Hydride) Batteries
1/ Never charge Ni-Mh batteries at a current higher than 4.5 amps. Although these batteries can give a higher voltage than Ni-Cad Batteries, they are much more sensitive and easy to damage if charged too quickly. |
|
Hints, Tips and Information
Ride Height
To allow the suspension on any RC model to do its work properly, it needs to ride in a position where it is able to react to any bumps and holes it may encounter on the track. Therefore, it needs to be adjusted to somewhere in-between those limits. That position is commonly termed "ground clearance" or "ride height" and is generally measured as the distance between the underside of the chassis and the ground, with the motor and battery etc installed. |
|
RC Models:
|
Radio & Motors: |
Other
Accessories: |