Radio Controlled Models
Share RCScrapyard on Facebook
RCScrapyard Radio Controlled Models
Flags
RCScrapyard.net contains Google AdSense Ads and Amazon Affiliate links, from which we may earn commission. See our Disclosure page for more information.
bar

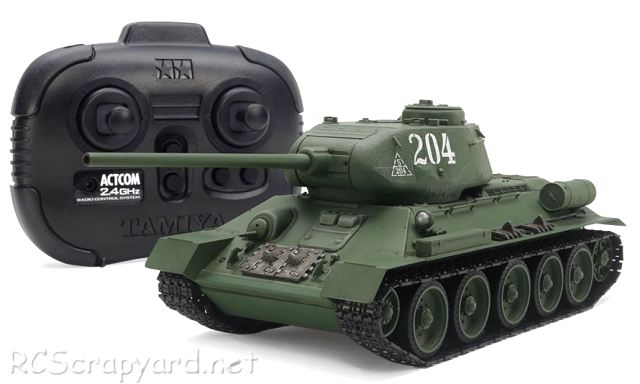
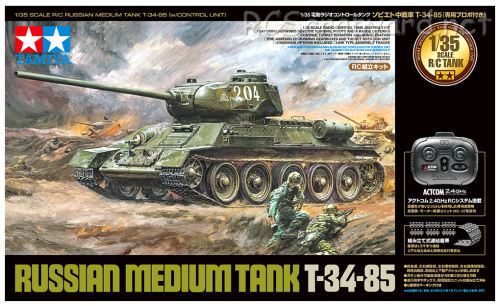
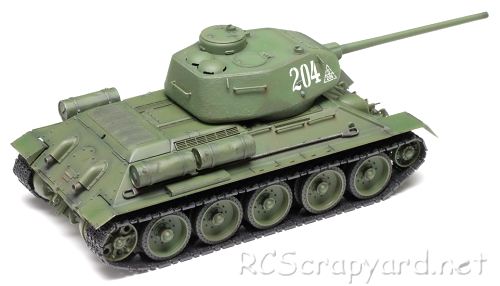
Tamiya Russian Medium Tank T-34-85 - 48216 (Radio Controlled Model Review)

1/35 Scale Electric Tank -

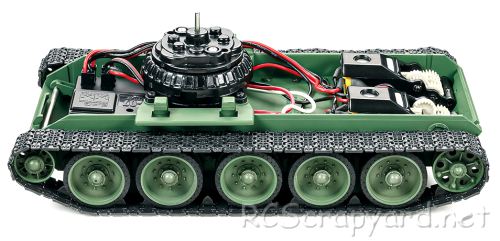
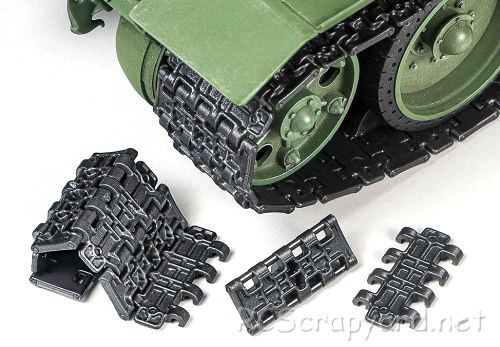
  Released by Tamiya on February 20, 2021, the 1/35 R/C Russian Medium Tank T-34-85 (# 48216), is a re-release, with upgraded TTU-10 Radio and MC-07 Control Unit.

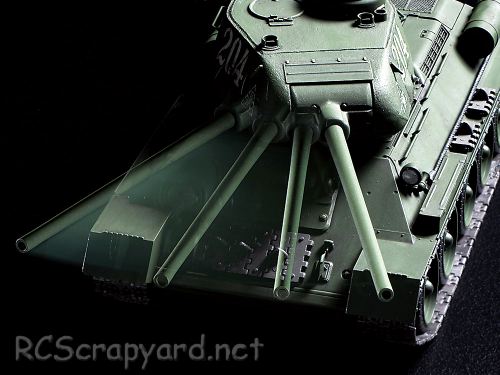
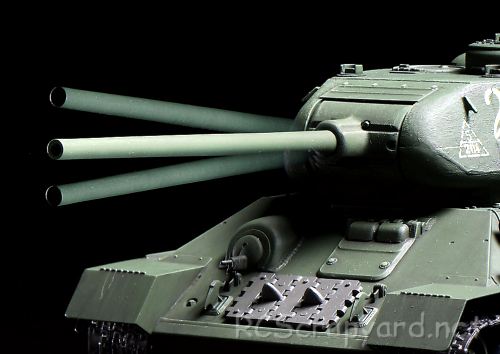
  Sold as an unassembled kit, this RC tank has two drive motors and two turret control unit motors, with four forward and reversel speed options, transmitter operated, plus left/right turning, sharp turning and pivoting, as well as turret rotation and main gun elevation/depression control.

Tamiya Russian Medium Tank T-34-85 - # 48216

▼ Scroll Down for More Images ▼


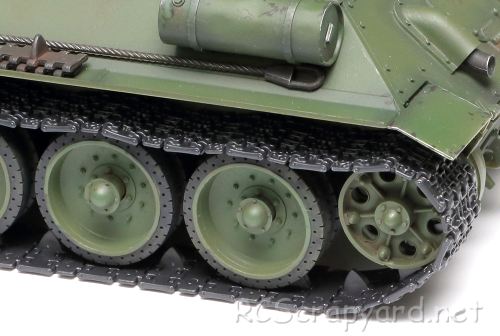
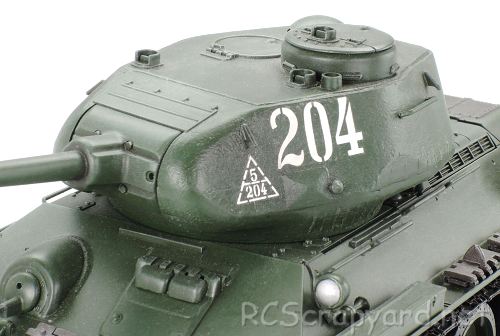
  Russian T-34-85 tanks forced the invading German forces to develop the Tiger and Panther tanks to counter its strength. It was armed with a powerful 85mm gun and featured heavy armor with a large-sized cast turret. Powering this lightweight tank was a 500ps V12 liquid-cooled diesel engine that enabled great mobility. From the end of 1943 to June 1945, approximately 29,000 units were produced and continued to serve as Russia's main battle tank alongside the T-34-76 until the end of the war.


Rating: 44 Stars out of 5 RCScrapyard


Gas/Nitro Engines Body Shells Radio Transmitters etc Tires Wheels/Rims Electronic Speed Controllers Battery Packs / Chargers Electric Motors


Flags


Tamiya Russian Medium Tank T-34-85 - # 48216
Tamiya Russian Medium Tank T-34-85
Tamiya Russian Medium Tank T-34-85 - # 48216
Tamiya Russian Medium Tank T-34-85
Tamiya Russian Medium Tank T-34-85 - # 48216
Tamiya Russian Medium Tank T-34-85
Tamiya Russian Medium Tank T-34-85 - # 48216
Tamiya Russian Medium Tank T-34-85
Tamiya Russian Medium Tank T-34-85 - # 48216
Tamiya Russian Medium Tank T-34-85
Tamiya Russian Medium Tank T-34-85 - # 48216
Tamiya Russian Medium Tank T-34-85
Tamiya Russian Medium Tank T-34-85 - # 48216
Tamiya Russian Medium Tank T-34-85
Tamiya Russian Medium Tank T-34-85 - # 48216
Tamiya Russian Medium Tank T-34-85

Hints, Tips and Information

How to avoid Radio Interference

1/  The first consideration when installing your Receiver into your Electrically Powered Model is to make sure it is well away from the Negative Battery terminal, and the Motor. The Magnetic field can cause stuttering type interference at times of high current draw (i.e., Fast Acceleration)

2/  Make sure the Ariel tube is long enough for the Ariel wire. The tip of this wire is highly sensitive and should be as high, and as far away from the Motor as possible (yup, its that magnetic field prob again)

3/  If all else fails, a simple tip that often works for all RC Model enthusiasts is to wrap the receiver in Aluminium Foil, to shield against any magnetic and external radio interference.

Read the Complete Article  ▶ ▶


Tamiya Buggys Tamiya Trucks Tamiya Monster Trucks Tamiya Rock Crawlers Tamiya Off Road Chassis Types Tamiya Touring Car Tamiya Drift Car Tamiya WRC Car Tamiya M Chassis
Tamiya Tractor Trucks Tamiya Touring Car Chassis Tamiya F1 Tamiya F1/Le Mans Chassis Types Tamiya Military Tamiya Tanks


Hints, Tips and Information

Battery Connectors

   Over the years I have been racing radio controlled model cars of all descriptions, I have tried a number of different connectors for my batteries.

   My first car was a Tamiya Boomerang, and of course the batteries I used all had the standard Tamiya connectors, which were fine with the kit supplied 27T silver can electric motor, but I soon discovered their problem when I installed my first Modified motor. The high current demands of the motor created so much heat, the plastic surround of the connectors melted and fused together. No matter how I tried they could not be disconnected. My only option was to cut the wires.

   From there I moved over to Corally connectors, commonly referred to by many now as Bullet connectors. Comprising of a short length of 4mm gold plated tube at one end, and what looks like what we used to call a Chinese lantern fitting that slotted inside the tube, also gold plated. Although they were highly efficient and reasonably easy to install and use, I never really took to this type of connector, I think it was the fact that there was always the possibility of the positive and negative being connected wrongly in poor light, and also that if positioned side by side, each connector could work loose and become exposed, leaving the possibility of a short circuit.

Read the Complete Article  ▶ ▶


Hints, Tips and Information

How to Charge Rechargeable Batteries for Peak Performance

Ni-Cad (Nickel Cadmium) Batteries

1/  All Ni-Cad Batteries have to be Discharged soon after use. This is to avoid the dreaded "Memory" effect that on subsequent re-charges can cause a momentary drop in performance during a race. A simple discharger can be made from a car 12v bulb.

2/  Try to time your charge to complete just before a race. This will ensure maximum punch and duration. If a Ni-Cad is left to cool after a charge this advantage dissipates.

3/  The higher the charge current the more Punch the Ni-Cad battery will have (up to around 8 amps), however, the downside to this is a reduction in duration and effective battery life.

4/  Ni-Cad Batteries should be left to cool for about an hour after use before recharging. This will increase the effective life of the battery.


Ni-Mh (Nickel Metal Hydride) Batteries

1/  Never charge Ni-Mh batteries at a current higher than 4.5 amps. Although these batteries can give a higher voltage than Ni-Cad Batteries, they are much more sensitive and easy to damage if charged too quickly.

2/  Charging methods for Ni-Mh batteries can also be detrimental.

Read the Complete Article  ▶ ▶


^ TOP ^

RC Models:
Radio
& Motors:
Other
Accessories: