Radio Controlled Models
Share RCScrapyard on Facebook
RCScrapyard Radio Controlled Models
Flags
RCScrapyard.net contains Google AdSense Ads and Amazon Affiliate links, from which we may earn commission. See our Disclosure page for more information.
bar

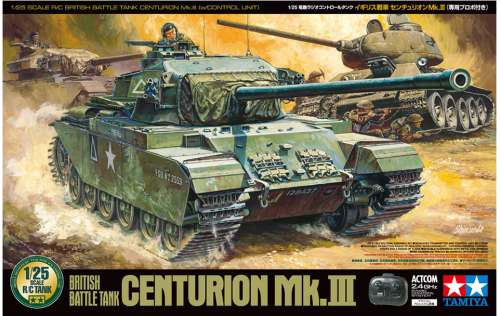
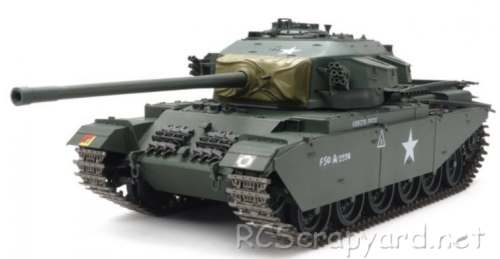
Tamiya British Tank Centurion Mk.III - Complete Kit - 56604 (Radio Controlled Model Review)

1/25 Scale Electric Tank -

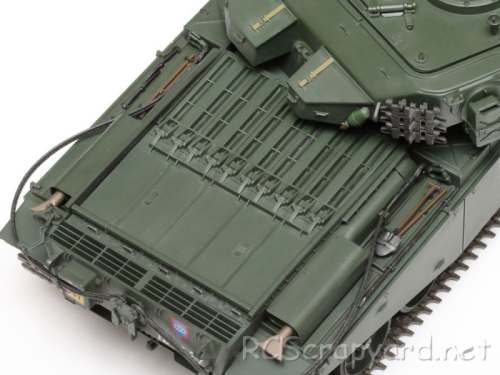
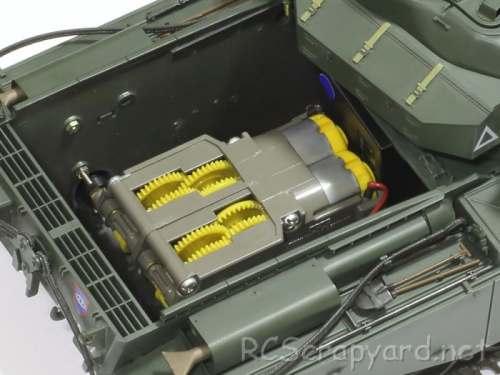
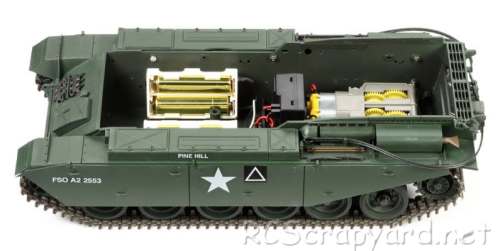
  Released by Tamiya on December 23, 2017, the British Tank Centurion Mk.III (#56604) is based on a plastic tub chassis, with a rear-mounted double gearbox driven by two 280 electric motors, that operate together or individually to produce forward/reverse running and pivot turning.

Tamiya British Tank Centurion Mk.III - # 56604

▼ Scroll Down for More Images ▼


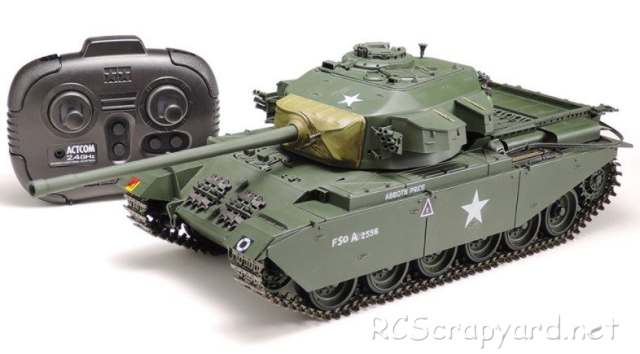
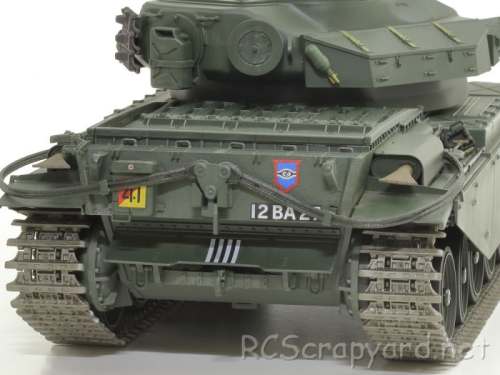
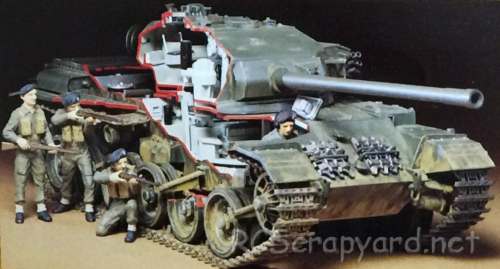
  Developed to meet the ever-improving threat of German armor, the Centurion evolved into the British main battle tank in the post-WWII era. The Mk.III was perhaps the most polished Centurion variant, upgunned with the powerful 20 pounder gun; it was deployed in the Korean War and was regarded by many as the lynchpin of the Allied forces on the peninsula. Some 2,800 Mk.III Centurions were produced between 1948 and 1956. Deployed not just by Britain but also by clients such as India, Israel and Egypt, they were a formidable force in whatever military's colors they were used.


Rating: 44 Stars out of 5 RCScrapyard


Gas/Nitro Engines Body Shells Radio Transmitters etc Tires Wheels/Rims Electronic Speed Controllers Battery Packs / Chargers Electric Motors


Flags


Tamiya British Tank Centurion Mk.III

Hints, Tips and Information

How to avoid Radio Interference

1/  The first consideration when installing your Receiver into your Electrically Powered Model is to make sure it is well away from the Negative Battery terminal, and the Motor. The Magnetic field can cause stuttering type interference at times of high current draw (i.e., Fast Acceleration)

2/  Make sure the Ariel tube is long enough for the Ariel wire. The tip of this wire is highly sensitive and should be as high, and as far away from the Motor as possible (yup, its that magnetic field prob again)

3/  If all else fails, a simple tip that often works for all RC Model enthusiasts is to wrap the receiver in Aluminium Foil, to shield against any magnetic and external radio interference.

Read the Complete Article  ▶ ▶


Tamiya Buggys Tamiya Trucks Tamiya Monster Trucks Tamiya Rock Crawlers Tamiya Off Road Chassis Types Tamiya Touring Car Tamiya Drift Car Tamiya WRC Car Tamiya M Chassis
Tamiya Tractor Trucks Tamiya Touring Car Chassis Tamiya F1 Tamiya F1/Le Mans Chassis Types Tamiya Military Tamiya Tanks


Hints, Tips and Information

Your First Race Meeting

   When you finally find a racing club near to where you live, that initial experience of stepping up onto the rostrum and looking down over the track can be very daunting. But soon, as the race starts, adrenaline will kick in and away you go. For the next five minutes, your focus is on nothing but getting your car around each corner, avoiding all the other cars on the track and just getting to the end of the race.

   Maybe your batteries dumped or you crashed and the car was damaged, perhaps you didn't actually come last, whatever happened, it doesn't really matter - you are well and truly hooked.

Read the Complete Article  ▶ ▶


Hints, Tips and Information

Ride Height

   To allow the suspension on any RC model to do its work properly, it needs to ride in a position where it is able to react to any bumps and holes it may encounter on the track. Therefore, it needs to be adjusted to somewhere in-between those limits. That position is commonly termed "ground clearance" or "ride height" and is generally measured as the distance between the underside of the chassis and the ground, with the motor and battery etc installed.

   Simply speaking, determining the optimum ride height is dependent on the specific track conditions and "droop" setting (see my previous article). For Off Road models the rule is simple, the bigger the bumps and the deeper the holes, the higher the ride height. And for On Road, the lower the ride height, the better.

Read the Complete Article  ▶ ▶


^ TOP ^

RC Models:
Radio
& Motors:
Other
Accessories: