|
|
|
|
|


|
|
1/10 Scale Electric Pan Car:
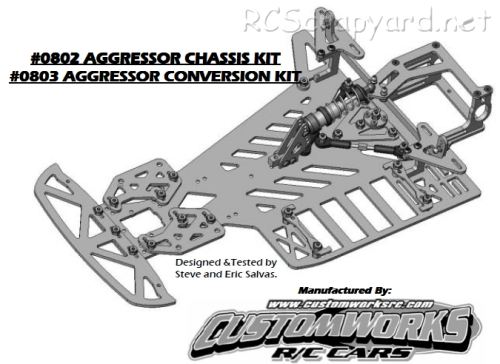
Custom Works Aggressor SE (Radio Controlled Model Review)History and Info:
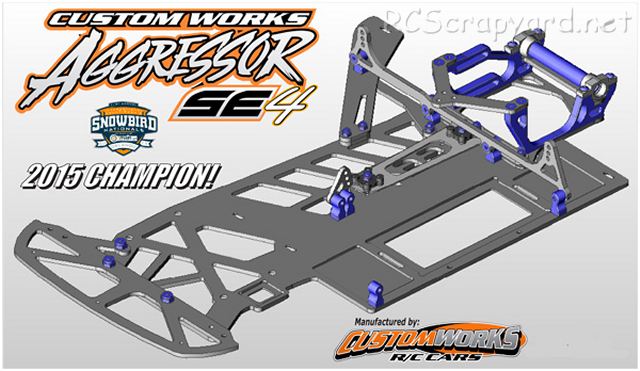
Between circa 2010 to 2016, Custom Works introduced a number of Aggressor SE (Special Edition) Conversion kits, for the Aggressor Speedway Oval Pan Car - # 0800. This page is intended to provide some basic information on these kits, and provide some images so collectors and enthusiasts can possibly identify any finds.
▼ Scroll Down for More Images ▼
|


|
|
|
|
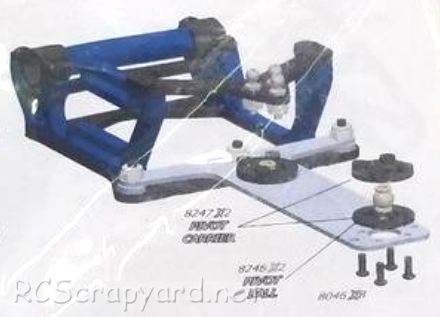
★ Custom Works Aggressor SE Chassis ★
★ Custom Works Aggressor SE Chassis ★
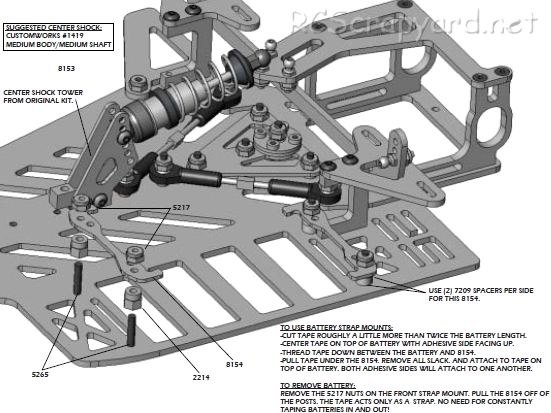
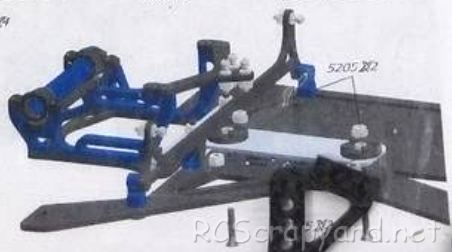
★ Custom Works Aggressor SE3 Chassis ★
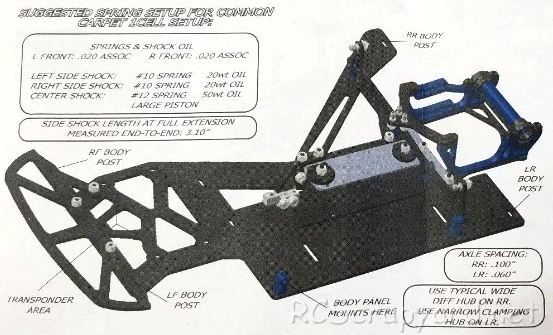
★ Custom Works Aggressor SE3 Chassis ★
★ Custom Works Aggressor SE3 Chassis ★

★ Custom Works Aggressor SE3 Chassis ★
|
Buying a Used Radio Controlled Model
|
|
Manufacturers and Brands Catalogued and Listed by RC-Scrapyard.
At present, the RC Model Manufacturers, Brands and Distributors covered by us are: ABC Hobby, Academy, Acme Racing, Agama Racing, Amewi, Ansmann Racing, ARRMA, Team Associated, Atomic RC, Axial, AYK, Bolink, BSD Racing, Capricorn, Carisma, Carson, Caster Racing, Cen, Corally, Custom Works, Durango, Duratrax, ECX - Electrix, Exceed RC, FG Modellsport, FS-Racing, FTX, Fujimi, Gmade, GS-Racing, Harm, HBX, Helion, Heng Long, Himoto Racing, Hirobo, Hitari, Hobao, Hong-Nor, Hot Bodies, HPI, HSP, Intech, Integy, Jamara, JQ Products, Kawada, Kyosho, Losi, LRP, Maisto, Mardave, Marui, Maverick, MCD Racing, Megatech, Mugen, New Bright, Nichimo, Nikko, Nkok, Ofna, Pro-Pulse, Protech, PTI, RC4WD, Redcat Racing, RJ-Speed, Robitronic, Schumacher, Seben, Serpent, Smartech, Sportwerks, Step-Up, Tamiya, Team-C Racing, Team Magic, Thunder Tiger, Tomy, Top Racing, Traxxas, Trinity, Tyco, Vaterra RC, Venom, VRX Racing, WLToys, X-Factory, Xmods, Xpress, Xray, XTM, Yankee RC, Yokomo, ZD Racing and Zipzaps. |
|
Hints, Tips and Information
Ackerman
So - What is Ackerman? |
|
Hints, Tips and Information
Driving On Road
The basic driving style most commonly used for all forms of on road, tarmac and carpet racing, involves using the full width of the road available, and cutting each apex as tight as possible, whilst keeping complete control of the car on the track. The style, often referred to as "Rounding" looks quite simple to those watching, but to get it right needs good hand eye coordination and lots of practice. |
|
RC Models:
|
Radio & Motors: |
Other
Accessories: |