Radio Controlled Models
Share RCScrapyard on Facebook
RCScrapyard Radio Controlled Models
Flags
RCScrapyard.net contains Google AdSense Ads and Amazon Affiliate links, from which we may earn commission. See our Disclosure page for more information.
bar

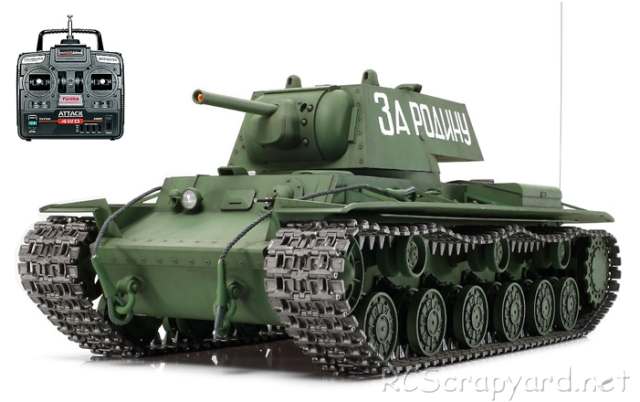
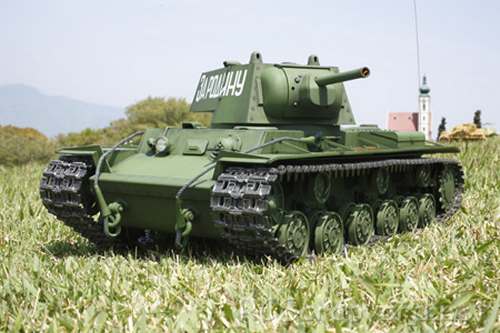
Tamiya Russian Heavy Tank KV-1 - Full Option Complete Kit - 56027 (Radio Controlled Model Review)

1/16 Scale Electric Tank -

  Released by Tamiya June 24, 2009, the Russian Heavy Tank KV-1 (#56027) is the Full Option Complete Kit version, with a battery, charger and 4-channel radio system included.

  A front-mounted double gearbox, with two electric motors, operate together or individually to produce forward/reverse running and pivot turning. Metal torsion bars and suspension arms combine with the wide tracks to smoothly absorb bumps and dips in the terrain and provide high manoeuvrability. In addition, realistic engine sounds accompany the tank as it starts up, drives and stops to idle. The main gun can be elevated, depressed and swung to the left and right.

Tamiya Russian Heavy Tank KV-1 - # 56027

▼ Scroll Down for More Images ▼


  When the Soviets entered the Winter War, the SMK, KV and a third design, the T-100, were sent to be tested in combat conditions. The KV outperformed the SMK and T-100 designs. The KV's heavy armour proved highly resistant to Finnish anti-tank weapons, making it more difficult to stop. In 1939, the production of 50 KVs was ordered. During the war, the Soviets found it difficult to deal with the concrete bunkers used by the Finns and a request was made for a tank with a large howitzer. One of the rush projects to meet the request put the howitzer in a new turret on one of the KV tanks. Initially known as 'Little turret KV' and 'Big turret KV', the 76-mm-armed tank was redesignated as the KV-1 Heavy Tank and the 152 mm howitzer one as KV-2 Heavy Artillery Tank.

  This model comes with metal bushings, that after a short while, when dust and grit get into them, can actually wear into the metal drive shafts that spin in them - we recommend these should be replaced by a full set of steel shielded ball bearings ASAP.


Rating: 44 Stars out of 5 RCScrapyard


Gas/Nitro Engines Body Shells Radio Transmitters etc Tires Wheels/Rims Electronic Speed Controllers Battery Packs / Chargers Electric Motors


Flags


Tamiya Russian Heavy Tank KV-1

Hints, Tips and Information

How to avoid Radio Interference

1/  The first consideration when installing your Receiver into your Electrically Powered Model is to make sure it is well away from the Negative Battery terminal, and the Motor. The Magnetic field can cause stuttering type interference at times of high current draw (i.e., Fast Acceleration)

2/  Make sure the Ariel tube is long enough for the Ariel wire. The tip of this wire is highly sensitive and should be as high, and as far away from the Motor as possible (yup, its that magnetic field prob again)

3/  If all else fails, a simple tip that often works for all RC Model enthusiasts is to wrap the receiver in Aluminium Foil, to shield against any magnetic and external radio interference.

Read the Complete Article  ▶ ▶


Tamiya Buggys Tamiya Trucks Tamiya Monster Trucks Tamiya Rock Crawlers Tamiya Off Road Chassis Types Tamiya Touring Car Tamiya Drift Car Tamiya WRC Car Tamiya M Chassis
Tamiya Tractor Trucks Tamiya Touring Car Chassis Tamiya F1 Tamiya F1/Le Mans Chassis Types Tamiya Military Tamiya Tanks


Hints, Tips and Information

Battery Connectors

   Over the years I have been racing radio controlled model cars of all descriptions, I have tried a number of different connectors for my batteries.

   My first car was a Tamiya Boomerang, and of course the batteries I used all had the standard Tamiya connectors, which were fine with the kit supplied 27T silver can electric motor, but I soon discovered their problem when I installed my first Modified motor. The high current demands of the motor created so much heat, the plastic surround of the connectors melted and fused together. No matter how I tried they could not be disconnected. My only option was to cut the wires.

   From there I moved over to Corally connectors, commonly referred to by many now as Bullet connectors. Comprising of a short length of 4mm gold plated tube at one end, and what looks like what we used to call a Chinese lantern fitting that slotted inside the tube, also gold plated. Although they were highly efficient and reasonably easy to install and use, I never really took to this type of connector, I think it was the fact that there was always the possibility of the positive and negative being connected wrongly in poor light, and also that if positioned side by side, each connector could work loose and become exposed, leaving the possibility of a short circuit.

Read the Complete Article  ▶ ▶


Hints, Tips and Information

Choosing the best Wheels

   When it comes to wheels, the majority of people tend to go for what looks good, something that will make their car stand out from the crowd, but are they the best wheels for you when it comes to winning races on the track?

   Quite a number of years ago I read an article in an RC magazine about RC model wheels and how important it is to have the right ones on your car. I was so impressed by that article that I immediately sold off all my old wheels and bought a batch of new ones - why? Read on.

Read the Complete Article  ▶ ▶


^ TOP ^

RC Models:
Radio
& Motors:
Other
Accessories: