Radio Controlled Models
Share RCScrapyard on Facebook
RCScrapyard Radio Controlled Models
Flags
RCScrapyard.net contains Google AdSense Ads and Amazon Affiliate links, from which we may earn commission. See our Disclosure page for more information.
bar

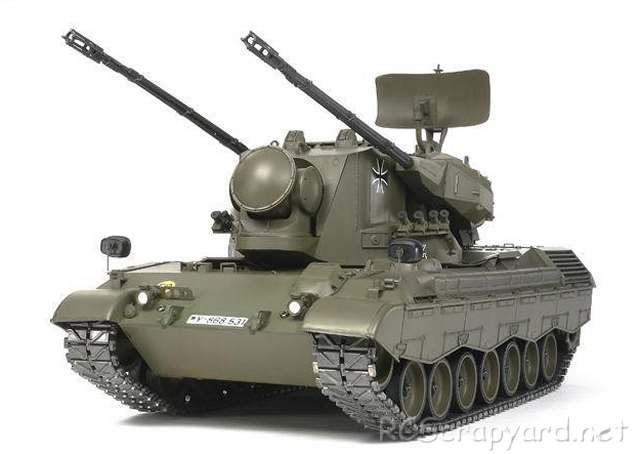
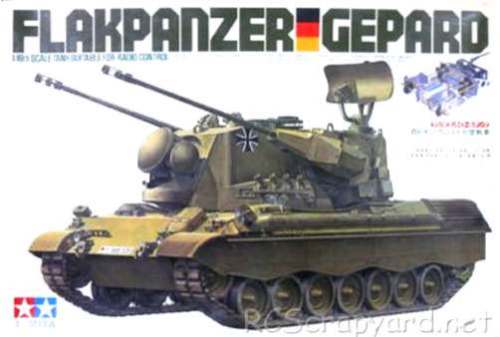
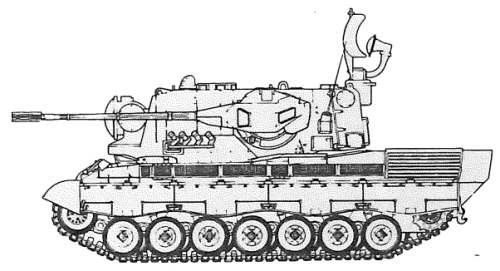
Tamiya Flakpanzer Gepard - 56003 (Radio Controlled Model Review)

1/16 Scale Electric Tank -

  Released by Tamiya on October 30, 1978, the German Flakpanzer Gepard Tank - RA230 (#56003) came as a basic assembly kit.

  A front-mounted gearbox, has a single electric motor for forward/reverse left/right turns. Metal torsion bars and suspension arms combine with the wide tracks to smoothly absorb bumps and dips in the terrain.

Tamiya Flakpanzer Gepard - # 56003

▼ Scroll Down for More Images ▼


  Based on the hull of the Leopard 1 tank, with a large fully rotating turret, the Flugabwehrkanonenpanzer Gepard ("anti-aircraft cannon tank Cheetah") better known as the Flakpanzer Gepard, is an all-weather capable German self-propelled anti-aircraft gun (SPAAG). Developed in the 1960s and fielded in the 1970s and has been upgraded several times with the latest electronics. It constituted a cornerstone of the air defence of the German Army and a number of other NATO countries until the Gepard was phased out in late 2010, to be replaced by "SysFla".

  This model comes with metal bushings, that after a short while, when dust and grit get into them, can actually wear into the metal drive shafts that spin in them - we recommend these should be replaced by a full set of steel shielded ball bearings ASAP.


Rating: 44 Stars out of 5 RCScrapyard


Gas/Nitro Engines Body Shells Radio Transmitters etc Tires Wheels/Rims Electronic Speed Controllers Battery Packs / Chargers Electric Motors


Flags


Tamiya Flakpanzer Gepard
Tamiya Flakpanzer Gepard 56003
Tamiya Flakpanzer Gepard
Tamiya Flakpanzer Gepard 56003
Tamiya Flakpanzer Gepard
Tamiya Flakpanzer Gepard 56003
Tamiya Flakpanzer Gepard
Tamiya Flakpanzer Gepard 56003

Hints, Tips and Information

How to avoid Radio Interference

1/  The first consideration when installing your Receiver into your Electrically Powered Model is to make sure it is well away from the Negative Battery terminal, and the Motor. The Magnetic field can cause stuttering type interference at times of high current draw (i.e., Fast Acceleration)

2/  Make sure the Ariel tube is long enough for the Ariel wire. The tip of this wire is highly sensitive and should be as high, and as far away from the Motor as possible (yup, its that magnetic field prob again)

3/  If all else fails, a simple tip that often works for all RC Model enthusiasts is to wrap the receiver in Aluminium Foil, to shield against any magnetic and external radio interference.

Read the Complete Article  ▶ ▶


Tamiya Buggys Tamiya Trucks Tamiya Monster Trucks Tamiya Rock Crawlers Tamiya Off Road Chassis Types Tamiya Touring Car Tamiya Drift Car Tamiya WRC Car Tamiya M Chassis
Tamiya Tractor Trucks Tamiya Touring Car Chassis Tamiya F1 Tamiya F1/Le Mans Chassis Types Tamiya Military Tamiya Tanks


Hints, Tips and Information

Keeping Notes

   If all you will ever do is go racing at your local track every week, then this article is not for you. However, if you ever look towards travelling around to different tracks around the country, or even the world, the value of keeping notes is all too obvious.

   Every time I raced in a regional or national competition meeting, I would make detailed notes, aided by a little local knowledge initially, and later fine tuned to suit my own driving style.

   My experience now means there are few, if any outdoor tarmac tracks within a 300 mile radius I haven't been to, and my notes on motor, gearing, camber angles, shock settings, tire choice and what inserts work best for that particular track, amongst others, allow me to save valuable time on the finer points of car setup, that can be done in the warmth of my own home on the kitchen table days before the meeting, instead of the often crippling heat, or the arduous conditions inside a wind blown tent.

Read the Complete Article  ▶ ▶


Hints, Tips and Information

Painting a Lexan Body Shell.

   Most RC Model kits come with an unpainted, clear Lexan plastic Body Shell you yourself must prepare and paint. This type of Body Shell is painted on the inside, and special spray or brush on Polycarbonate Paints MUST be used.

   The beauty of this is you can go wild and show off your artistic ability, or simply choose your favourite colour, and add some choice decals later.

   This article is for those who have never done this kind of thing before, and need some basic guidance.


   Firstly, cut off the waste from the body shell with sharp scissors. If required finish off the rounded wheel arches with smooth sandpaper wrapped around a drinks can.

   Any holes for body posts must also be drilled before painting. Place the clear body shell over the model and adjust the posts so the shell is in the desired position. Where the posts touch the shell make a small dot with a marker pen.
Next, pierce small holes in the shell where the dots are from the inside. Place the shell on an old piece of wood and drill the post holes, again, from the inside.

Read the Complete Article  ▶ ▶


^ TOP ^

RC Models:
Radio
& Motors:
Other
Accessories: