How to put on Decals
After spending lots of time and effort to paint your bodyshell, you come to the point where you make it look good by putting on all those flashy decals, but before you rush in with the scissors and start cutting, there are a few things you should do first.
Before you Start
 Good preparation is key to a perfect job, so before you do anything with your decals, you must first of all wash your hands, and then make sure the bodyshell is clean and no oil or grime from your previously grubby fingers remains on the Polycarbonate Lexan surface. Methylated spirits is the thing to use, or failing that, use one of those wipes you use for your computer monitor screen.
Cutting Out the Decals
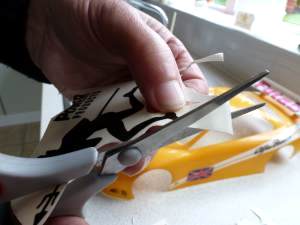
 As the body shell dries, you can carefully cut out the decals from the sheet. Do the big ones first and leave the smallest ones for last. Avoid square edges - round them off.
Decal Positioning
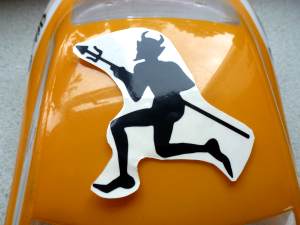
 Now you can prepare to the decals for positioning. Carefully remove the backing paper from the decal with your thumb nail, and then put it back on again, but slightly out of line.
Decal Positioning
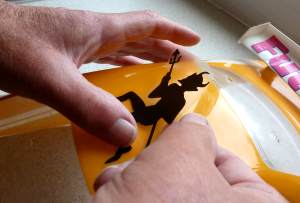
 Place the decal in the position you want it on the bodyshell and when you are satisfied, press down the sticky corner onto the bodyshell and peel off the backing paper, following it along with your fingers to avoid any bubbles. Repeat the process until all your decals are in place. Go all over each decal with your thumb nail and make shure the rounded corners are completely stuck down.
How to deal with Air Bubbles
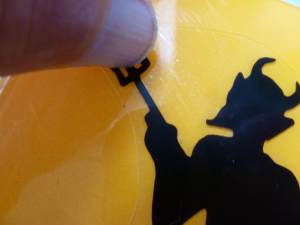
 Any bubbles or misfitting areas can be corrected by using a sharp modelling knife to carefully pierce the bubbles, or score the poorly fitting area and complete the process with your finger nail.
 Some misalignments can often be fixed using a hair dryer on the offending decal to soften the glue enough to allow you to reposition it, but be careful; Lexan can react like heat-shrink and may wrinkle if you use too much heat.
| 


